Installing Oscillot on Curved or Angled Fences: Complete Technical Guide

Installing Oscillot on Curved or Angled Fences: Complete Technical Guide
Adapting Award-Winning Technology to Non-Standard Property Geometries
Not all properties have perfectly straight fence lines. Modern residential properties frequently feature curved architectural elements, angled corner sections, sloped terrain, or irregular property boundaries. These non-standard geometries present significant challenges for rigid containment systems but become manageable—even simple—with Oscillot's modular, adaptable installation approach. This comprehensive guide walks you through every aspect of installing Oscillot on complex fence geometries, providing technical specifications, component recommendations, and installation strategies.
Understanding Curved vs. Angled vs. Sloped Challenges
Three Distinct Geometric Challenges:
- Curved fences: Gradual bends following property lines or landscape contours
- Angled fences: Discrete angular changes (typically 45°–135°) at corner transitions
- Sloped terrain: Variable fence heights due to hillside or uneven ground elevation changes
Each challenge requires different technical solutions. This guide addresses all three, providing specific component requirements and installation techniques for each.
Curved Fence Installation: The Geometry Advantage
Why Oscillot Adapts Better to Curves Than Competitors
Oscillot kits consist of independent paddle units connected by rotational bearing assemblies. This modularity means the system doesn't require perfectly straight runs—it accommodates gradual curves through proper bracket placement and bearing alignment. Traditional fence toppers and rigid cage systems cannot adapt to curves; they require straight sections and become ineffective around bends.
Curved Installation Principle:
Place Brackets at regular intervals (typically 15–25cm spacing depending on fence material) around the curve, maintaining consistent height and forward-facing paddle orientation. The individual paddles will align naturally to the fence's curve, distributing the containment effect evenly around the bend.
Technical Specifications for Curved Installation
Bracket Spacing on Curves:
- Tight curves (radius less than 3 meters): 15cm maximum spacing; tighter spacing prevents flex and lateral movement
- Gradual curves (radius 3–10 meters): 18–22cm spacing provides adequate structural support
- Gentle curves (radius exceeding 10 meters): 22–25cm spacing acceptable for standard applications
- Critical principle: Tighter curves require tighter bracket spacing to prevent structural flex
Components Required for Curved Fence Installation:
- Bracket (€3.00 per unit) — Enables flexible positioning; typically 50% more units needed than straight fence equivalents
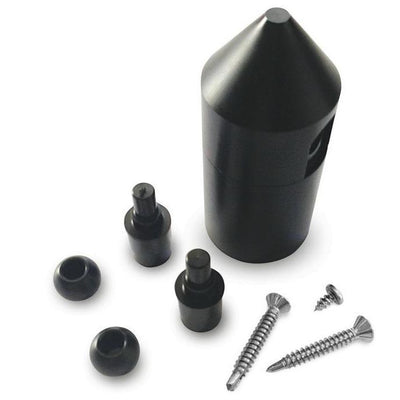
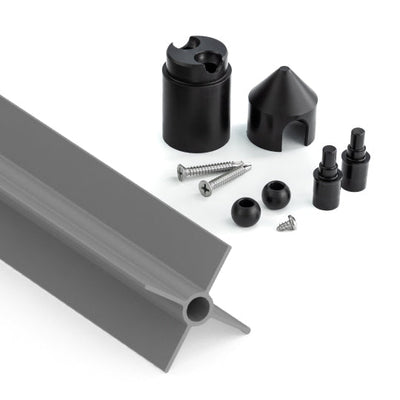
- Dual Knuckle Post Kit (€15.99) — Accommodates angled connections at gradual curve transitions
- Axle Pins (€2.79+ per unit) — Multiple pins maintain paddle alignment and prevent wobbling through curves
Curved Installation Step-by-Step
- Detailed measurement: Measure fence at 30cm intervals around the entire curve—not straight-line distance, but actual curve distance
- Radius calculation: Identify the curve's radius—this determines bracket spacing requirements
- Height verification: Confirm fence height remains constant throughout curve (or adjust for intentional sloping)
- Bracket positioning: Mark bracket positions at calculated intervals, maintaining consistent distance from fence and forward orientation
- Installation: Install brackets following standard procedures, ensuring each is perpendicular to fence surface
- Paddle alignment: As paddles are installed around the curve, they naturally follow the fence's curve radius
- Testing: Verify paddle rotation smoothly around the curve; any binding indicates spacing adjustment needed
Angled Fence Sections: Corner Installation Strategy
Angled corners (45° bends, L-shaped property lines, T-shaped intersections) are common in modern property designs and present structural and behavioral containment challenges.
The Two-Challenge Problem
- Structural challenge: Maintaining paddle alignment and rotational bearing integrity through angular transitions while supporting structural loads
- Behavioral challenge: Preventing cats from using the corner angle as a climbing aid or exploiting corner gaps in paddle coverage
Angled Fence Solution Approach
Corner Installation Strategy:
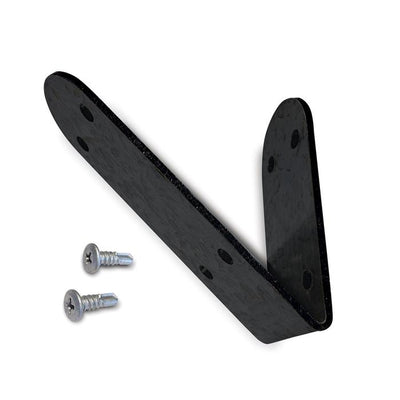
At angular transitions, install an extra Bracket at the interior corner of the angle. Position this corner bracket slightly forward (3–5cm) from the fence line to ensure paddle rotation isn't obstructed by the fence corner itself. This offset positioning prevents bearing binding while maintaining continuous paddlecontainment.
Component Requirements for 90° Corner
- Brackets: 2–3 additional units for corner reinforcement (€3.00 each) — provides structural integrity at stress point
- Dual Knuckle Post Kit: 1 unit for corner structural support (€15.99) — handles loads concentration at corner joint
- Axle Pin set: 1–2 additional pins for corner bearing assembly (€2.79–€5.58) — ensures smooth corner rotation
- Supplementary paddle coverage: Additional paddle segment at interior corner to eliminate climbing gap
- Estimated additional cost for comprehensive corner protection: €25–€50
Corner Installation Technical Details
- Bracket offset: Corner bracket positioned 3–5cm forward from fence corner prevents bearing obstruction
- Bearing alignment: Ensure bearing assembly is perpendicular to fence line at both pre-corner and post-corner sections
- Paddle continuity: Install supplementary paddle at interior corner to prevent cats exploiting corner gap
- Fastener reinforcement: Use slightly longer fasteners at corner brackets to accommodate offset positioning
- Load testing: Test corner assembly thoroughly before allowing cats into space—corners experience greater stress during climbing attempts
Sloped Terrain: Height Variance Solutions
Hillside properties and sloped terrain create variable fence heights. A fence might be 1.8m high on uphill sections but only 1.2m high on downslope areas. This creates escape opportunities on downslope sections where cats can reach higher from ground level.
The Slope Challenge
Traditional fence solutions fail on slopes because they follow natural terrain, creating height variations that cats exploit. On downslope areas, cats effectively gain 30–60cm of additional height relative to fence top, making normal height containment inadequate.
Oscillot Slope Solution
Rather than allowing paddle coverage to follow terrain naturally, maintain consistent paddle height (measured from ground level at that location) across variable terrain:
- Height measurement protocol: Measure paddle height from actual ground level at each location, not from fence base
- Variable post installation: Use taller posts on downslope sections to maintain consistent paddle elevation despite terrain variation
- Staggered bracket positioning: Position brackets at different heights to follow terrain while maintaining paddle orientation parallel to ground
- Custom paddle sizing: Use Cat Paddle Sets in combination with individual paddle components to create custom height coverage
Technical Specifications for Sloped Installation
- Post height adjustment: Increase post height by the slope's vertical drop to maintain consistent paddle elevation
- Elevation survey: For slopes exceeding 0.5 meters elevation change, conduct simple survey using level and measuring tape
- Component redundancy: Build in 10–15cm additional height margin to account for measurement variations and installation tolerances
- Drainage consideration: Ensure water drainage at base of tall downslope posts—water pooling can destabilize tall post structures
Curved Gates and Access Points on Non-Standard Fences
Curved and angled fences often include similarly curved gates, presenting unique containment challenges at access points.
Gate Installation on Curved/Angled Fences:
Install paddle coverage up to the gate's hinge point, then extend paddle coverage across the gate opening itself using arched gate solutions. The key is maintaining continuous containment coverage across all potential escape routes, including gate openings and transitions.
Gate-specific components:
- Brackets: Additional units for curved gate frame mounting (€3.00 each; typically 3–5 additional units for curved gates)
- Gate-specific Paddle Sets: Using appropriate paddle length to match gate width and curve
- Corner reinforcement brackets: Extra structural support at gate hinges on curved sections
Installation Planning for Complex Geometries: Step-by-Step Process
Phase 1: Detailed Site Assessment
- Fence measurement: Measure fence length at 30cm intervals to identify curves and angle points
- Terrain documentation: Note elevation changes across property; sketch terrain profile
- Obstacle identification: Document climbing aids within 1.5m of fence line
- Gate location mapping: Mark all gate locations and opening dimensions
- Fence material documentation: Note fence material type and condition at different sections
- Photography: Take photos from multiple angles for detailed planning
Phase 2: Design and Kit Selection
- Actual distance calculation: Account for actual measured distance, not straight-line distance
- Complexity surcharge: Add 5–10% extra length for curves and overlap areas beyond straight-line measurements
- Kit sizing: Select appropriate kit size accounting for geometry complexity
- Component procurement planning: Estimate component needs beyond kit specifications
Phase 3: Component Procurement
- Kit selection: Order appropriate kit size from oscillot.eu
- Additional brackets: Order 50% more brackets than straight-fence equivalents (€3.00 each)
- Post kits: Secure extra Dual Knuckle Post Kits (€15.99) for corner sections
- Axle pins: Include additional Axle Pins (€2.79+) for complex bearing arrangements
- Supplementary paddles: Order additional Cat Paddle Sets (€24.00) for transition areas and gates
Phase 4: Installation Execution
- Professional consultation: For complex geometries exceeding 20 meters, consult Oscillot installation specialists
- Bracket positioning: Mark positions at calculated intervals based on curve radius and slope
- Component installation: Follow standard procedures with attention to bearing alignment on curves and height variation on slopes
- Testing: Verify smooth paddle rotation throughout all curves and angles
- Final inspection: Document installation with photographs for warranty records
Real Property Example: L-Shaped Garden with Slope
Property characteristics:
- Main fence run: 18.6m (relatively straight)
- Secondary wing: 12.4m (angled 75° at connection)
- Sloped terrain: 1.5m elevation change across property
- Gate locations: One primary gate at main entry, one secondary gate on secondary wing
Component Solution:
- Primary 18.6m kit (€424 on sale) — Main fence run
- Secondary 12.4m kit (€288 on sale) — Wing fence coverage
- Additional components for angle/slope: €100–€150 (extra Brackets, Dual Knuckle Posts, Axle Pins)
- Supplementary paddle sets for gate coverage: €50–€75
- Professional installation consultation: €100–€200 (optional)
- Total investment: €962–€1,237
Cost Comparison: Traditional angled fence topper installation on same property would cost €2,500–€4,500 with significantly higher failure risk on curved and sloped sections.
Material-Specific Installation Guidance
Timber Fences
- Curves are naturally accommodated; bracket spacing follows wood grain and frame spacing
- Use timber-specific bracket arrangements included with Timber/Vinyl kits
- Ensure wood grain orientation supports bracket fastening—avoid grain running counter to fastener
- Check for fence settling on slopes—wood fences may shift on slopes over time
Colorbond/Metal Fences
- Curved metal requires careful attention to bearing alignment to prevent binding
- Ensure Axle Pins are properly aligned perpendicular to fence plane across curves
- Metal thermal expansion can create tight spots—loosen fasteners slightly during hot weather
- On slopes, ensure metal fence bottom maintains ground clearance—metal may settle on slopes
Vinyl Fences
- Vinyl's rigidity makes curves challenging—ensure bracket positioning accommodates vinyl's thermal movement
- Vinyl thermal expansion/contraction is significant—loosen fasteners 20% on very hot days; retighten if temperature drops
- On slopes, monitor vinyl settling—rigid material may crack if foundation shifts on sloped terrain
- Vinyl fences are heavier—use additional brackets on sloped sections for structural integrity
Professional Installation Services for Complex Geometries
For curved or angled installations exceeding 20 meters, or involving significant terrain changes, Oscillot recommends professional consultation through our installation network. Airtasker-partnered installers experienced in complex geometry installations can ensure optimal containment and prevent costly installation errors.
Maintenance Considerations for Complex Geometries
Non-standard geometries require slightly more frequent maintenance than straight fence sections:
- Corner sections (monthly): Inspect alignment drift; corners experience greater structural stress
- Curved sections: Check for paddle binding or misalignment; ensure bearing rotation remains smooth throughout curve
- Sloped sections: Monitor water drainage at tall post bases; check for settling or shift in post positions
Order Maintenance Components: Bracket Packs & Axle Pins
Conclusion: Non-Standard Geometries Become Simple Solutions
With careful planning and appropriate component selection, Oscillot transforms non-standard property geometries from containment challenges into successfully secured outdoor spaces. Your property's curves and angles aren't obstacles—they're simply geometric variations that Oscillot's modular system accommodates naturally.